BUILD YOUR OWN WORKSHOP HEATER
This heater was built and designed by Chris Ireland (Desperate Dan and all credit belongs to him)
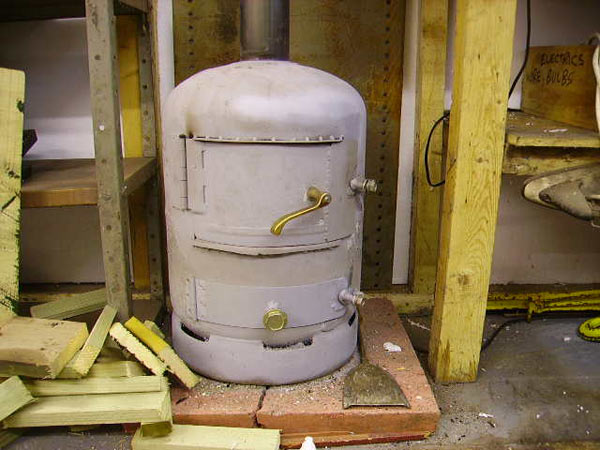
This is a description of how I converted a standard Calor Gas bottle into a woodburning stove for £0.
WARNING…READ THIS; These bottles contain volatile gas under pressure. They must be empty before any attempt is made to modify. I’m not recommending you play about with one, this is merely a description of how I built mine. Far better you construct a rectangular container out of 1/8” or ¼” plate
WOOD BURNERS
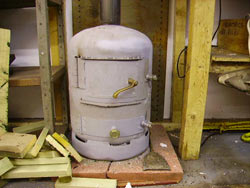
I have one to heat my bungalow, & they’re amazingly efficient. They work by heating the body of the stove, & heat is radiated from both the stove & the chimney. They will continue to give off heat even after they have gone out. They are highly controllable by a system of flaps & valves. This one was meant to be a prototype, but worked so well I kept it. However, I have incorporated some mods in my description. The whole stove was built from scrap.
 PREPARATION
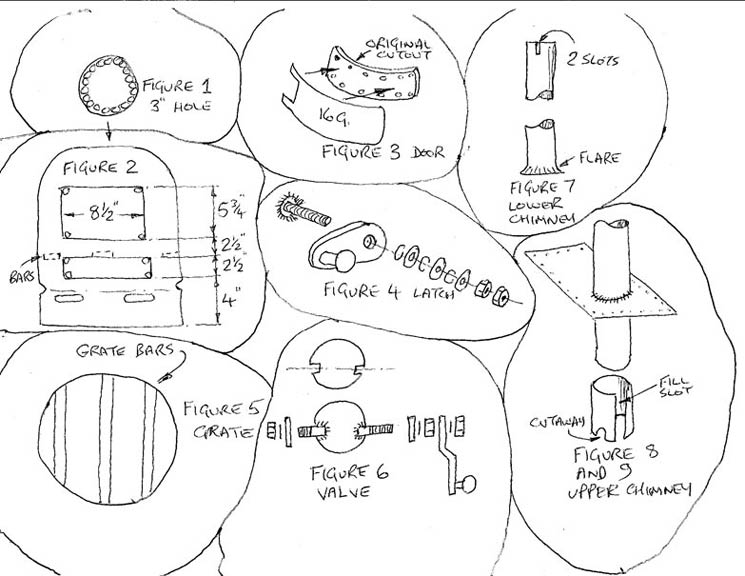
(all figure numbers relate to main picture at bottom of page)
First job was to remove any gas residue. I tried to unscrew the brass fitting, but it was solid, so I drilled it through @8mm using plenty of oil to avoid sparks (once again, this is pretty foolhardy), & allowed it to vent for a couple of days outside. Next job was to mark out a 3” circle in the top for the chimney, & centre-pop it 5mm inside(. Using plenty of oil, & a sharp 3mm drill running at slow speed, a series of pilot holes were drilled all the way round. And I mean PLENTY of oil. It was left outside again to vent. Back in & the holes were opened out to 8-10mm so they all virtually joined. The thin sections were tapped through with a screwdriver & the plate (with valve) removed. Phew…that’s the bit I don’t like doing. The bottle was filled with water & left out for another day. It is now in a safe state to grind/weld. The reason I kept taking it outside was that even after I drilled the first hole, it stank like a bad fart & stank the workshop out when I left it in overnight. Even after filling with water, it still gave off a foul odour until I lit it!
 DOORS (Figures 2 & 3)
These bottles are heavily galvanised, so sand it off. Mark out the doors. I use a tyre-paint pen. Drill a 10mm hole in each corner. The door aperture can now be cut out with an angle grinder & metal cutting discs (or Plasma cutter, if you have access to one). Cut as close to the lines as possible, neatly, as you’ll be using the two bits you’ve cut out. Remove any sharp edges & burrs.
Drill a series of holes about 20mm apart & 10mm diameter around the outside of the offcuts (Figure 3) They will become the doors. Sand down the weld on the big piece, & also on the bottle for @ 1” each side of the opening. Next, cut some 16 gauge sheet metal 1” bigger than these offcuts, which will give you a ½” overlap for sealing. The sheet metal can now be welded to the offcuts through the holes. Start at one end, & ease it around so it follows the radius. Leave a cut-out for the hinge. You now have the doors. Tack- weld the hinges to the bottle first, position the doors so they fit flush, & finish-weld.
 FITTINGS (Figure 4)
For knobs, I used some big bolts & an old brass door handle.
Latches were made from 1”x 1/8” flat bar. I welded a 6mm bolt by the door, & used alternating spring/flat washers to allow the latch some “spring”. These are quite fiddly to do.
GRATE (Figure 5)
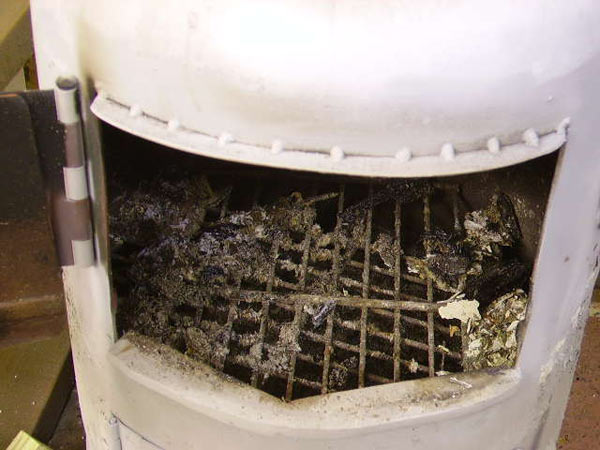
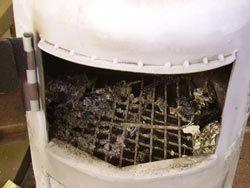
Three pieces of 1” x ¼” flat bar were welded inside the bottle, exactly level with the top of the lower door opening. An old Barby grill was cut up. I used two pieces, one across & one widthways. Fit isn’t critical. Note…don’t weld the grill in. You may need to replace it one day.
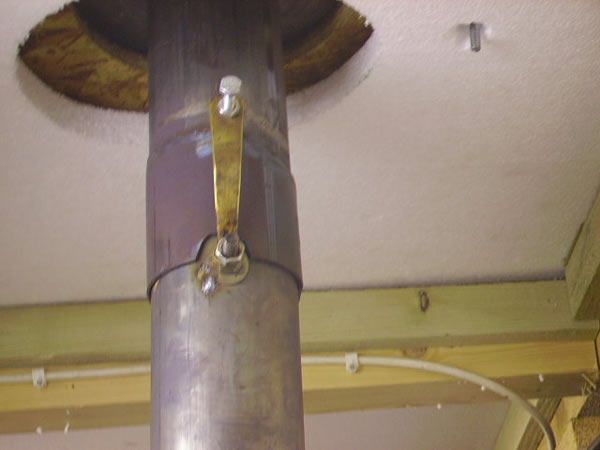
CONTROL VALVE (Figure 6 ) This is the secret of this stove working. Cut a disc from 3mm plate. Saw & file a slot each side, on the centre-line. The disc should be a reasonable fit in the chimney-pipe. Cut the threaded portion off two 8mm bolts & weld to centre of disc. For the lever, I used an old door latch. Disc is located in chimney & a penny-washer & spring washer used each side. Tighten so valve opens freely. The lever is secured with a locknut, & should run parallel to the disc (ie when the valve is closed, the lever should point across the chimney, & when it’s open, along it).
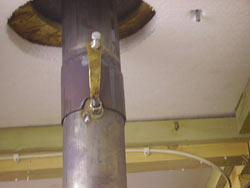 LOWER CHIMNEY (Figure 7)
I used 3” mild steel tube, in two sections. The stove should now be positioned where it’s going to sit in your shed. You can fit legs at this point, if you want, but mine just sits on a paving slab. The bottle sits 6” away from any wooden structures. The wood gets warm when it’s flat-out, but not alarmingly-so. I have an old steel shelf behind it, covering polystyrene insulation, & it appears fine. Locate it near where you normally work. The first section can be cut to length. It should finish 6” below the roof. Two slots 8mm wide & 1” long can now be cut in one end to accept the disc-valve. The other end should be flared out for where it’s welded to the bottle. I did this by laying the tube on my workmate & hammering it out with a ball-pien hammer. Makes welding much easier.
UPPER CHIMNEY (Figure 8)
Mine protrudes above the roof @ 5ft. This portion will need to slide over the lower chimney. To make a sleeve, cut a 4” section off the end & saw it lengthways. Open it out slightly & de-burr. Fill the gap with some sheet metal. With a bit of tapping & bashing, it can be slid over the upper pipe & tacked. Once it’s a slide-fit over the lower, it can be welded. Two semi-circles must be filed into the sleeve to clear the penny washers on the valve.
CHIMNEY ASSEMBLY (Figure 9)
Cut a piece of 16 guage 14” x 10” (or to suit your roof). Drill a series of 3mm holes around the outside for screws, & cut a 3” hole in the centre. This should be a good fit to the chimney, & allow for a slight angle to suit the pitch of your roof.
Tack the lower chimney to the bottle making sure it’s parallel. Using the chimney as a guide, cut a 4” hole in the roof. Slide the plate over the upper chimney, get on the roof, & slide it onto the lower tube. I also found this fiddly & easier with two people. The semi-circular cutouts should sit snugly over the valve washers, but not be in contact. Once you’re happy with the position of everything, tack the roof-plate from inside. Mark out the inside of the roof & enlarge the hole to 6”.
Weld up the chimney sections & plate (this will distort somewhat, I guess you could use 3mm instead of 16 guage). Re-assemble & screw/bolt the plate to the roof. Use an old frying-pan as a rain-hat. Don’t put any sealer on the underside. I used a rubber-based brush-on product on the outside.
THAT’S IT…..TIME TO LIGHT-UP!
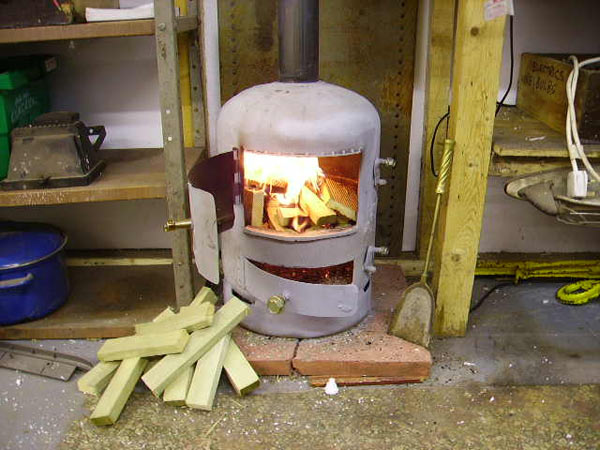
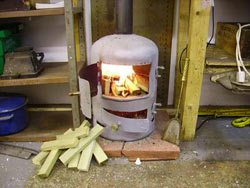
Try it on wood first. Chimney flap & lower door open, big door shut. Small piece of fire-lighter, & chopped wood. Build the wood into a pyramid & light it. It should roar away in seconds. To calm it down, close the bottom door. To shut it down instantly, close the valve. When I first lit mine, I put a modest amount on. Once happy, I really filled it, & got it roaring big-time. A bit daunting, but the reason was, to burn the paint off. Wire-brush it whilst it’s going. Mucho-smoko, but it’ll soon go. I sprayed mine with some leftover VHT paint. I went in my shed this morning. 53 degrees. Put a pretty modest pile of wood on, & ten minutes later, 66 degrees. Mind you, I’ve fully insulated the place, inc. roof, with 1” thick polystyrene (8’ x 4’ sheet £6), & got rid of ALL draughts. I tried it on Homefire Ovals, one small shovelful burnt for 6 hours, but they were too slow-burning & a bit smelly. I’m going to try it on ordinary coal. Wood gives out by far the most heat. Expect some trial & error, but you’ll soon decide on the best fuel, & combination of bottom door/valve adjustment. I run mine with the valve fully open, but may have to adjust it for coal.
