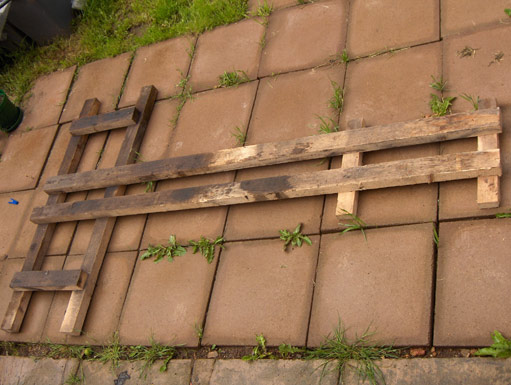


 When I bought my trike project it came with a neat wooden trike jig to aid in keeping it all square. So what I have done is measured it all up so I could share this great idea.
To start with, the wood used is 2” X 2”.
For the first step you need 2 bits that are 8’ long and 3 bits that are 18” long.
Second step you need 2 bits about 4’ long ( or atleast 2” wider than your axle ) and 2 bits at 12” long.
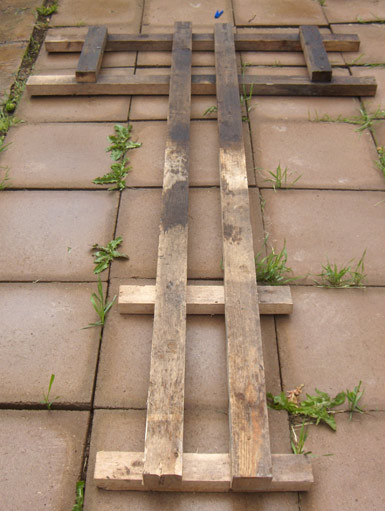
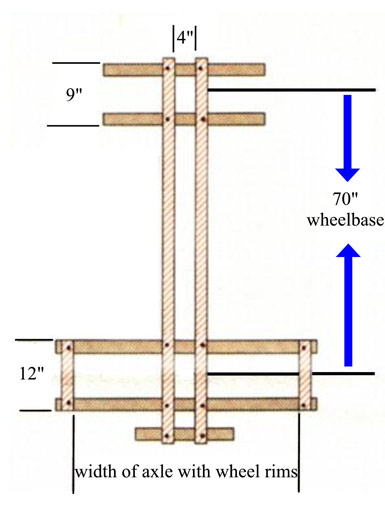
Lay the two 8’ bits next to each other with a 14” gap between them ( this is the width of the front tyre ) , screw a piece of the 18” bits at each end to keep the 14” gap all the way down.. place the third 18” piece about 9” in from one of the others. This will allow the front wheel to sit just off the ground.Decide on your wheelbase and mark this on the 8’ pieces. Take the 4’ bits and fix exactly 6” behind and in-front of your marks and at right angles to the longer pieces, leaving a 12” gap between them.Now sit your axle with rims attached onto the 4’ bits and central. Fix the 12” bits inside or outside the wheels with them pushed right upto the wheels. This should keep your axle and frame all in line and ready to start building.
I hope that makes sense.
Gary